Friday, October 18, 2013

Half Bathroom Makeover

Finally, another before and after to share with you! I must say, this is one of my favorites so far. Our half bath is down a short hall from the kitchen and across from the master bedroom. It not only serves as a bathroom for guests, but is also my laundry room. It's not the biggest bathroom/laundry room but I think it's perfect for us. 

Check out the before and after. The paint color went from yellow to Barcelona Beige to tone things down a little. We replaced the dated and yellowed flooring with a richer hardwood linoleum. Then, we tore out the old laminate countertops and sink and had a new cultured granite countertop installed. After the major changes were done, we found a new mirror, light fixture, and decorations to finish off this little bathroom.


The light we chose is actually an exterior light from Lowes. We wanted something rustic and none of the typical bathroom light fixtures had that look. We thought it went well with the oil rubbed bronze faucet. The mirror was snagged at HomeGoods and helps give a more customized look.


Here are some closeups of some little details that I love. The little bumblebee ceramic bowl is from Target and so is the straw wastebasket (both are from their Threshold line from late spring/early summer). The blue and white chevron rug is from Marshalls and inspired the color choice for the bathroom. 


This mason jar with wildflowers print is from Katie Daisy and we got the frame at Michaels. I love how it goes with the rustic feel but is fun and colorful. 


And here's my little laundry room! At the moment it's not really blog post worthy so this is the only shot you get. Maybe one day once it's a little more organized I will share it. :)

Wednesday, October 2, 2013

2 years together!

Since I haven't posted in over a month (wow...sorry about that), I thought I'd share some pictures from our 2nd anniversary. We've been very busy the past couple of months and were so excited to get a vacation. We went to the beach for a long weekend and had an awesome time.


We made it just in time before my favorite donut place closed for winter. I think my total for the three days they were open was five donuts but I could have eaten more. Trust me. Here's a no makeup picture of me during a late night donut run after checking in for the weekend. That's pure happiness right there. :)


We spent almost every day enjoying perfect beach weather. This is our favorite time of the year to go to the beach because the crowds are gone and the room rates have dropped. At night, we went off in search of things to do. Warning, this time of year is perfect for uncrowded beaches and low room rates, however, most of the shops have closed. We were able to find some yummy food though. That's a very important part to any vacation of course. 


We did spend one afternoon at the aquarium and pretty much had the place to ourselves! And I finally broke out the "nice" camera instead of my iPhone. Please enjoy a quick internet trip to the aquarium via my pictures. 


The aquarium trip ended up being on our actual anniversary so I wanted to have a picture of us taken. I've decided to try to have a picture of us on each anniversary (maybe for a picture collage or just to say we did it). We will see how long that lasts. Well, this year I asked a sweet lady take one after we got to the aquarium but it's pretty blurry. So, we had a little photo-shoot where we attempted to get a decent picture of ourselves. 


This extremely close picture with our heads chopped off was the only one that turned out okay. Oh well, at least we can say it was taken on our 2nd anniversary. Then we thought we'd take one of each other and photoshop them together. Hmm..maybe have me flipped and casually floating in the water facing Colin. I'm sure it will look very natural. :)


After our visit at the aquarium, we made a quick stop at a Civil War memorial. It was right by the ocean and had a gorgeous view. We always like to add little historic stops to our trips whenever we can and it was a bonus that it was right by the ocean. 


Well, I'd say that's a pretty good summary of our beach trip! Hope you've enjoyed the pictures and my rambling. I'll be back soon with some updated pictures of the inside of the house. Oh, and we're getting some updates done to the exterior of the house this week so those pictures will be coming also. :)

Tuesday, August 13, 2013

Surprise 25th Anniversary Party!

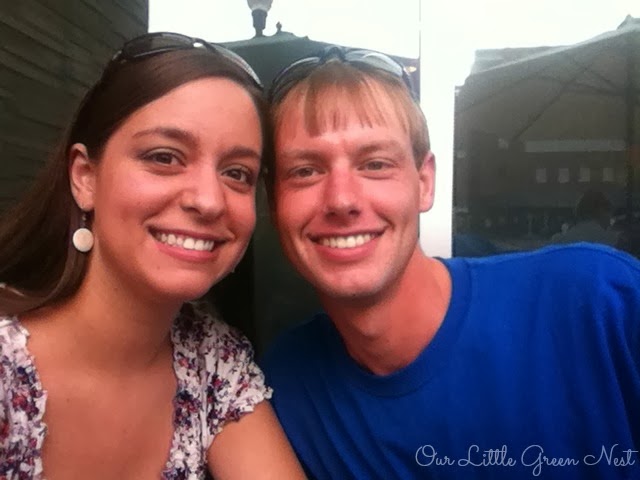
In honor of my parent's 25th wedding anniversary today, I wanted to share their surprise party from a couple weekends ago. My sister Kristin and I had been planning the details for a few months and the party wouldn't have happened without her and her husband. Here's the invitation we sent out and then framed for a decoration at the party (my parents names and my address have been blurred out). We ordered them from Shutterfly and I love how they hinted at the chalkboard theme.


My first thought was that a 25th anniversary party should probably be decked out with silver and fanciness but we wanted to take a more casual approach. We decided red, white, black and some silver would be nice. Coke bottles and chalkboards were chosen as the main decorations to go with the color scheme and casual feel.

We made these adorable Coke bottle place cards/favors for each guest and the name tag was actually made from chalkboard paper. I used a tag paper punch and Kristin wrote the names using a white felt tipped pen since chalk would rub off. We did go back over it with chalk to make it look a little more realistic. I had some black and white baker's twine that we used to tie the name tags in place.


Of course we had a huge storm come through as the party started and had to change some of our plans. Only about half of the guests were able to have a spot at the kitchen table and a card table set up in the living room. So, everyone chose their own seats (wherever they could find one) and the Coke bottles just served as a personalized favor.

The desk area in the kitchen was transformed into the drink station. Kristin came up with another decoration idea just hours before the party. We used baker's twine taped up with some washi tape and made a little picture bunting. The tiny clothespins are from the dollar section at Michaels and Kristin wrote on each one to spell LOVE. Isn't cute? Oh, and the adorable pictures really help with the overall cuteness.


Next up with decorations, we have the amazing cake. We ordered it from the baker who did both of our wedding cakes. She makes beautiful cakes and they are soo tasty (just ask any of our wedding guests or party guests)! Kristin already had the white cake plate and we wanted to play off the chalkboard/silver theme so we came up with this beauty. It was cinnamon chip cake with a layer of cream cheese in the middle and buttercream frosting. Yummm. 


I used a chalkboard I made for our engagement pictures for the "You are so loved" sign. I found chalkboard markers at Michaels (they come in all kinds of colors) and they showed up so much better than regular chalk. I still have this pretty sign sitting in my kitchen because who doesn't need a reminder every once and a while that you're loved. :)


We made the "chalkboard" cake bunting with black scrapbook paper and a white marker. Michaels actually had chalkboard scrapbook paper (what we used for the name tags) but we wanted this to be something that would last and not rub off. We used glue dots to hold the bunting in place on the baker's twine and tied it to dowels. Oh, and after the bunting was taken off the cake we put it in empty Coke bottles and gave it to my parents.

Now that I'm done showing off the decorations, it's time to share the semi-surprise! My mom knew about the party because we decided she wouldn't like being surprised. Word to the wise, know the person you are throwing a surprise party for and how they will be affected. If you think there's any chance they may pass out, wet their pants, or run away crying, you may want to clue them in. Now, my dad on the other hand, we thought would love a good surprise and my mom helped us make it a complete surprise. Just to prove this fact, I'm sharing the pictures of the actual surprise below.


Please note the massive amounts of rain falling in the background. Colin was assisting with an umbrella to get my mom inside without being soaked. Now, notice the look of shock when he saw me and Kristin with our cameras pointed at him. Next, when he turns and sees the group of twenty people yelling "surprise". Finally, when he realizes what the party is for and that we got him good. Oh yeah. 


The minutes that followed were filled with laughter and quite a bit of blushing. Once everyone settled down, we had a great supper. We served hummus and pita, chicken kabobs, veggies, rice, and salad from a restaurant our mom and dad love. Everyone found a place to eat inside (because of the flood happening outside) and seemed to enjoy the food and company. 


During dinner and before the cake cutting, our guests were able to flip through some old family albums for entertainment. There was also a slideshow of pictures playing on the tv in the living room. We found that everyone loved getting to see my parent's wedding album and pictures of us as kids. This also gave everyone something to do since we weren't able to play corn-hole or be outside as planned.

Now, on to the cake pictures. I thought these turned out great! Isn't it a wonderful feeling when you get pictures you love and will cherish for the rest of your life??


Happy 25th Anniversary! We love y'all so much. Hope you enjoyed your "surprise" party!! Thank you to everyone who came to celebrate with us! We loved getting to show off our new house and were so proud to be able to host such a big milestone. Also, a huge thank you to Kristin, Stephen, and Colin! The party wouldn't have happened without those three. Now to start working on the theme for your 50th...  :)

Tuesday, July 16, 2013

Weathered Wood Crates


From the day we first moved into our adorable house, there's been one area that needed some attention. I knew that with a little Pinterest inspiration, this spot could be spectacular. This is by the side door that goes into the kitchen and we use it all the time. Hence, it is the easiest spot for Colin to leave his dirty work boots (thankfully he doesn't wear them in the house). We ended up leaving other shoes, a watering can, and a broom for a while too. Not exactly a welcoming sight for visitors or us. Here it is:


Our first idea was to find a storage bench but after looking around for a couple of months we realized that it would be hard to locate a bench for that small spot. I stumbled upon a blog and her shoe parking idea was perfect. This was inspiration I needed.

We went to an antique show a few of weekends ago and I found some old crates there. I decided $30 for one crappy antique crate was a little ridiculous especially when I needed two or three. I had seen several ideas on Pinterest using crates from craft stores so I decided that was the way to go. I ended up spending under $25 for three crates by using a couple coupons. We had just about everything we needed for a new method of "staining" I wanted to try so the whole project cost under $30. Which was a lot better than spending almost $100 for old crates and I figure these will last longer anyway. But, these unfinished wooden crates weren't exactly doing it for me.


I've never worked with stain before so I looked around Pinterest and see if there was any other way to make the crates look antique. I found this tutorial showing how to use tea and a steel wool/vinegar mixture. I'll give a brief overview of what I did but check out that tutorial for more detailed instructions. I used two old jars and filled the first 3/4 full with White Vinegar and half of a steel wool dish scrubber. I read that this should sit for at least 24  hours but mine ended up sitting for about 2 days. I made a pitcher of tea and used the 3 used tea bags in the other jar (it may work better to use black tea but I used what I had). This ended up sitting for about 2 days also.


I was a little nervous about whether this would work but decided to give it a shot. The far right picture in the collage shows how the steel wool looked after sitting several hours in the vinegar. You can see that it has already started turning a darker color. After my concoctions sat for a couple of days, I ventured out in the heat of July to start my project. I laid out several paper bags and packaging papers on our patio area and used an old towel so I could get comfy. Oh, and rocks to keep the paper from flying up are optional but very helpful. :)


I sanded down the crate a little bit before I started. Colin was smart and picked up that little paint container at Lowes and it made the project so much easier! It would have been impossible to get my paint brush down in those tiny jars. So, make sure you either have a wide mouthed jar or a container to pour the mixture into.

The tea gets painted on first and will just make the crate look wet and a tad bit darker. Here's a picture comparing the crate painted with tea next to an unfinished crate. Side note, I ended up running out of tea after my first crate. I just had Colin fill the jar up again and let it sit for a while. This seemed to work fine but you may want to use more than 3 tea bags and more water if you have a large amount of wood to stain.


You should try to let the tea dry for about 30 minutes but it was hot and I'm impatient and only waited a couple of minutes. Next, I painted on the steel wool/vinegar mixture. Here's the coolest part! Almost immediately it starts making the wood look much darker and distressed. I know there's a scientific reason with something about the acid and blah blah blah but I'll just say it's magic.


The color will continue to get darker and look more distressed. The fun thing about this project is I found the messier I painted, the better looking the crate! Another thing I noticed was that pieces of wood on the crate would take the stain differently and the colors would vary from light to very dark and some reddish! We never figured that out so if you have some insight, please share. They definitely don't look perfect and uniform but I really wanted them to look like I randomly found these crates and they were well loved already. 


The picture above shows the three crates in the different stages to show how the color changes. In clockwise order, it goes from unfinished to tea stained and then with the completed steel wool/vinegar. The first crate that was finished didn't stay as dark as it looked here and they all ended up about the same color. Here are some shots of the almost finished pieces (they still needed to finish drying). Yes, I am that crazy neighbor laying on the ground taking pictures of crates.


They all ended up being about the same color which is amazing after seeing how different they looked at different stages during the process. Needless to say, I'm a believe in the tea stain and steel wood/vinegar method now. And did I mention I hardly paid anything for the supplies? Just had to buy a paint brush and that paint container and the rest of the supplies were in my kitchen. Here's a before and after shot of the crates all set up and ready to go!


Now we have a cute little spot to park our shoes when we get home. I even have a place for my watering can and it doubles as decoration.  I still may work with the "decorations" on and around the crates. I'm thinking a neat welcome sign may look good? Or some other antique things? I'll keep you updated on what happens.


So, there you have it, the completed shoe storage area! I'm glad this little spot is checked off my list. Now to find some more wood to weather... :)